
While I thoroughly enjoy a faux glow that tricks others into thinking I just spent two full weeks OOO, I’d never been one of those people with a dedicated weekly self-tanning ritual. Honestly, I considered it a win if I applied self-tanner once every few months. Don’t get me wrong, I have an arsenal of tanning foams, lotions, and sprays in my bathroom patiently waiting to be uncapped—I just wasn’t confident enough in my skills to wind up without a patchy or lackluster result. Rather than experience the horror of a streaky tan, I simply resigned to a lack of warmth. Until now, that is.
I’m sick and tired of my self-tanning uncertainties, so I sent every single burning question I had over to trusted experts—and received quite the robust tutorial. Now? I’m proud to say I can nail an even, natural-looking tan every single time. With this guide, I’m confident that you can, too.
How to Apply Self-Tanner, at a Glance:
- Exfoliate
- Moisturizer drier areas
- Keep the rest of your skin dry
- Apply in circular motions
- Use excess on hands and feet
- Let it develop
- Rinse (without soap)
- Stay hydrated
1. Exfoliate
Proper prep is imperative when it comes to self-tanning. Dead skin buildup can create a barrier between your skin and the product (thus making your tan appear duller), which is why experts recommend exfoliating beforehand in the shower. Feel free to use any exfoliator you please, be it a body scrub, bar, brush, or basic loofah. Just make sure to thoroughly rinse off any lingering product, as you don’t want any residue to buffer the tanning solution.
As for shaving (which is technically a form of exfoliation), celebrity tan artist Isabel Alysa actually advises against hair removal right before you tan, as razor residue can linger on the body and alter the color. The same goes for waxing. “I always recommend waxing 48 hours [pre-tan], because of the wax residue that can be left on the skin,” she explains.
2. Moisturize Drier Areas
After you step out of the shower and pat dry, steer clear of any lotion. You want absolutely nothing between your skin and tanning product of choice—but you can use a pea-sized amount of lotion on drier areas, like your knees, elbows, and ankles.
“The DHA [aka, the active ingredient in self-tanner] likes drier areas, so it will really adhere and make those areas darker,” Alysa shares. So you want some sort of buffer for those drier regions, lest you wind up with an uneven result.
3. Keep the Rest of Your Skin Dry
Other than that pea-sized amount of lotion, you want a clean, dry, canvas to work with. “You shouldn’t have anything on your skin, because it can create a barrier between that DHA, which is the main ingredient that causes the dead skin cells to turn [darker],” says Alysa. “Applying anything on the skin prior can actually cause a tan not to develop in those areas.” Even something as subtle as perfume can wreck your tanning progress, she adds.
You may also want to wait a beat until your skin fully dries off after showering. Again, a dry canvas is best, and your skin may feel hot and damp for several minutes post-rinse. “Our pores are wide open right after a hot shower or bath,” adds Alysa. “That can cause the tan to not achieve its full darkness.”
4. Apply in Circular Motions
Okay, so you’ve perfected the prep. Fabulous! Now, here comes the actual tanning application: Apply your tanner of choice in sections (Alysa prefers to work from her legs up), using circular motions to blend.
If you’re using a spray solution, she recommends applying directly on your skin and using a mitt to massage in the product; if you have a mousse or foam, however, it’s better to apply product on the mitt (not your skin) before blending on the body. Mousses typically dry very fast, she notes, so you’ll have more control if you apply with the glove.
On that note: Keep the application slow and steady. “A lot of people think the darker the color guide (which is a bronzer), the darker the tan is going to become. But that also means the more orange and blotchy the tan can become,” says Alysa. If you’re a beginner, she recommends a less-is-more approach.
5. Use Excess on Hands and Feet
On more precise areas, like the hands and feet, Alysa advises against squeezing out another dollop of product. “Just use any excess product that’s on the mitt for your hands and feet,” she offers. Or you can apply a tiny amount of product on a makeup sponge or kabuki brush to dab on those areas. Point being: You don’t need a ton of tanner.
6. Let It Develop
Next up, the waiting game—or as I like to call it, the time for pacing around in your robe wondering if you’ll stain any furniture. The good news? Most self-tanning products have a relatively quick drying time, so you don’t have to worry too much about turning your sheets orange. (You just might not want to wear your favorite white outfit on the day you self-tan.) After around 20 minutes, you should be fine to change clothes and sit on the couch.
As for how long to let your tan develop? Well, you should always follow the instructions on your personal tanning product, but as a general rule, eight hours will give you a nice, dark tan.
“You can do anywhere between two to eight hours, depending on how dark you want to go,” says Alysa. “The longer it’s on the skin, the darker it’s going to become.”

7. Rinse (Without Soap)
Your first rinse is very, very important. “The number one cause for streaks in a self-tan is not rinsing your color guide off properly so you get watermarks in the shower,” Alysa says.
First thing’s first: Make sure the water temperature is warm, not scalding hot. Hot water has the ability to strip the natural oils from your skin—and in this case, the self-tan—so try to make your first rinse slightly less steamy. You’ll also want to keep it a water-only rinse—no soap.
“The self-tan will continue to develop for the next 24 hours, and using soap within that first rinse can actually stop the DHA from developing,” says Alysa. That said, if you fear your tan looks a little too dark, using soap in your first rinse can prevent any more development.
Then simply rinse until the water runs clear, checking for any streaks or marks on your skin. “If you do see that then just keep rinsing,” Alysa says. Pat your skin dry, and you’re set!
8. Stay Hydrated
Just like prep work, your aftercare can make or break your tan. Moisturizing and drinking a lot of water is key, says Alysa. “The more hydrated your tan is, the longer it’s going to last and the nicer it’s going to fade,” she adds. And, of course, protecting your skin from harsh UV rays with sunscreen is nonnegotiable (remember: Self-tanner does not guard your skin from sun damage!).
Mistakes That Make Your Tan Streaky and Fade Quickly
- Shaving or waxing right before: “Streaks are caused by user error, and it’s mostly caused by shaving right before a spray tan,” says Alysa. Again, that’s because lingering razor (or waxing) residue can create a buffer between your skin and the tanning product.
- Sweating: Most experts will recommend waiting 24 hours post-tan before any type of sweaty workout, but Alysa suggests simply waiting until your first rinse. Otherwise, your sweat tracks can cause streaks. It’s a similar story for sweating in a jacuzzi or sauna; the hot atmosphere can cause the tan to slide right off.
- Exfoliating afterwards: Any type of exfoliation (chemical or physical) promotes cell turnover, which means those darker, freshly tanned skin cells will shed much faster. Exfoliation is important for prep, but stow the scrubs unless you want to strip your tan.
- Getting a pedicure: This one surprised me! But according to Alysa, booking a pedi appointment right after you self-tan is a surefire way to undo all of your hard work. After all, pedicures involve soaking and scrubbing, both of which can easily strip the tan right off your skin. Better to wait a couple days before booking your next mani-pedi date, if you can swing it.

What About the Face?
Here’s the thing: You don’t necessarily want to apply the same self-tanner you use on your body on your face. Most experts prefer tanning waters or drops for the face, as they’re far easier to control—you can even mix the latter into your daily moisturizer. “If you want to dial up the tan you can apply the drops all over the face and massage in, ensuring you wash your hands,” says celebrity makeup artist Sofia Tilbury about self-tanning the face.
Still, prep is important, so make sure your face is clear of any lingering makeup or oil-based products before you apply. You may also want to exfoliate the day before to ensure an even surface free of dead skin buildup. “A lack of skin prep can mean that tan grabs on to any dry, uneven areas of texture, which is what can make the color appear patchy,” Tilbury adds.
FAQs
Do you put self-tanner on wet or dry skin?
Self-tanner should always go on dry skin. You want the most clear, even canvas possible, and water can dilute the product and leave you with a patchy result.
Is it better to put lotion on before or after self-tanner?
Apply lotion after you self-tan, not before. Lotion will create a barrier between your skin and the DHA (the active ingredient that makes you tan), which will lead to a funky (read: streaky) application. You can apply a pea-sized amount of lotion to drier areas, like the elbows, knees, and ankles, to make sure the DHA doesn’t accumulate in those regions and make them darker. But otherwise, lotion always goes on after all is said and done.
What can you do about streaks?
Look, steaks happen! If they happen to you, don’t fret. “I recommend just hopping in the shower for another rinse,” says Alysa. “If that doesn’t work, I always recommend using a lot of lotion to help blend it out.” If that still doesn’t work, a micellar water-soaked wipe can work wonders. Then you can apply a little more self-tanner to cover that streaky area.
If you want to speed up the fading process in general, you can always follow what not to do. Hop in a sauna or hot tub, use a body scrub, shave… all of these “mistakes” will help your tan fade in a flash.
Which Self-Tanner is Right for You?
Self-tanners come in many forms, from sprays to mousses to lotions, waters, drops, and more. Ultimately, it’s up to personal preference which one you use. See below for a quick rundown of each type along with some product recommendations; I also suggest you check out our full guide to self-tanners if you’re looking for personal, editor-vetted reviews.
- Spray: Sprays win in terms of ease. While Alysa does recommend blending with a mitt, you could theoretically just spray and go. “I could be completely tan with a spray in two minutes in my shower without having to rub it in,” she shares.
- Mousse: A mousse takes a little longer to blend, but that gives you slightly more control. It also requires physically blending the product into your skin, which many feel makes their tans appear darker.
- Lotion: “If you want to continually build a tan, these are great for every day,” says Alysa. However, lotions don’t give you immediate satisfaction like a mousse or spray. That said, they’re great for maintenance or if you want a buildable, gradual tan.
- Water: Tanning waters are super popular for the face, as they have no color guide (meaning they go on clear) and can seamlessly fit into your existing skincare or makeup routine.
- Drops: Similarly, drops are great to blend into your body lotion or face moisturizer for a gradual tan. “We see either self-tanning waters or drops being the first choice for face,” Alysa confirms.
Shop Self-Tanners
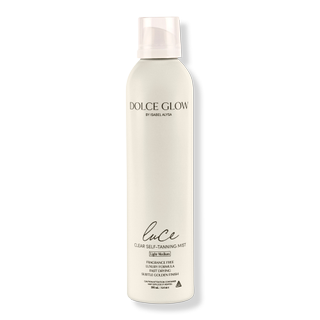
Dolce Glow
Self-Tanning Mist
One of the most elevated tanning sprays on the market, IMO. It features a 360-degree nozzle that helps you cover hard-to-reach areas, and a less than two-minute dry time.
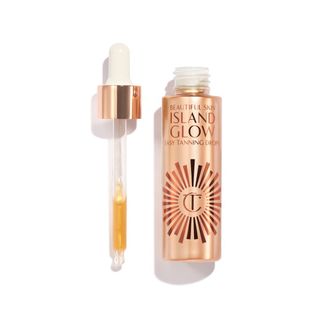
Charlotte Tilbury
Beautiful Skin Island Glow Easy Tanning Drops
If you’re a fan of the brand’s Hollywood Flawless Filter, you must give these drops a try—it’s like wearing a natural complexion booster 24/7.
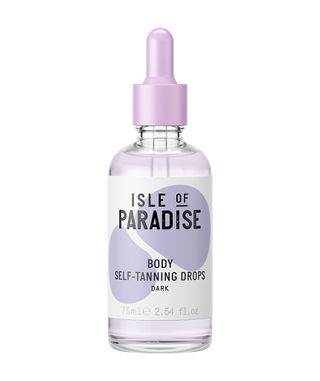
Isle Of Paradise
Self-Tanning Firming Body Drops
These are my personal favorite drops for the body. Just one pipette full of product into my lotion gives me a gradual, post-vacation tan.
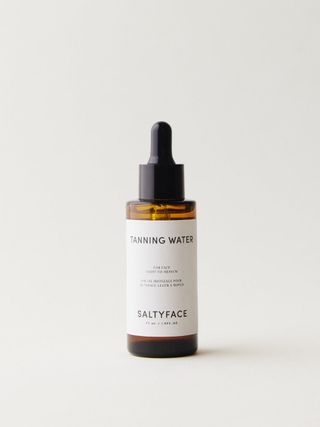
Three people asked for her spray-tan artist after WWW beauty editor Kaitlyn McLintock used this tanning water. The kicker? It only took a couple spritzes at home for her “seamless and sun-kissed” results.
Coco & Eve
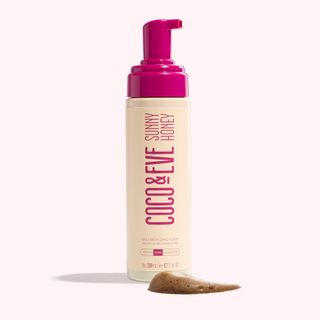
Sunny Honey Bali Bronzing Foam
I’m obsessed with this tanning mousse. I have a pretty sensitive nose when it comes to self-tanning products (so much so that it often deters me from tanning altogether!), but this one has a tropical scent that perfectly masks the pungent DHA. It also contains an olive-toned base to cancel out any orange hues, so my tan looks even more natural.
St. Tropez
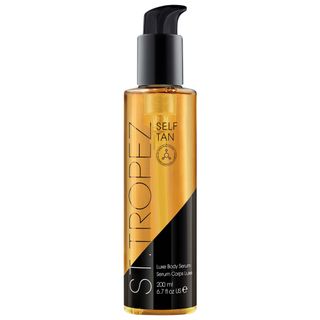
Luxe Body Serum
If you want to hydrate and build color at the same time, this body serum is so up your alley. It contains beloved skincare ingredients—like niacinamide, hyaluronic acid, and panthenol—that will not only make your moisture barrier happy but also help you tan last even longer (with a more even fade, too).
Clarins
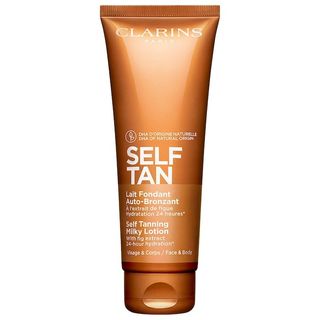
Self Tanning Face & Body Milky Lotion
You can never go wrong with Clarins. For gradual, buildable tans, this buttery lotion can’t be beat. It also doesn’t smell like a typical tanning product, if you’re sensitive to that biscuit-like DHA scent.


:quality(85):upscale()/2025/01/30/728/n/1922564/bae21b97679ba8cf1dcb88.10828921_.png)


